CSynth is now available to try out yourself. Video walk-throughs are shown in the Help section and examples in the examples section. We suggest you try those first.
To run with your own local data, launch CSynth and then present your files to it. Files may be presented to CSynth in various ways
- drag/drop: from eg Explorer onto the running CSynth canvas
- copy/paste: from eg Explorer onto the running CSynth canvas
- use ctrl-O in CSynth to open a file dialog and select file(s)
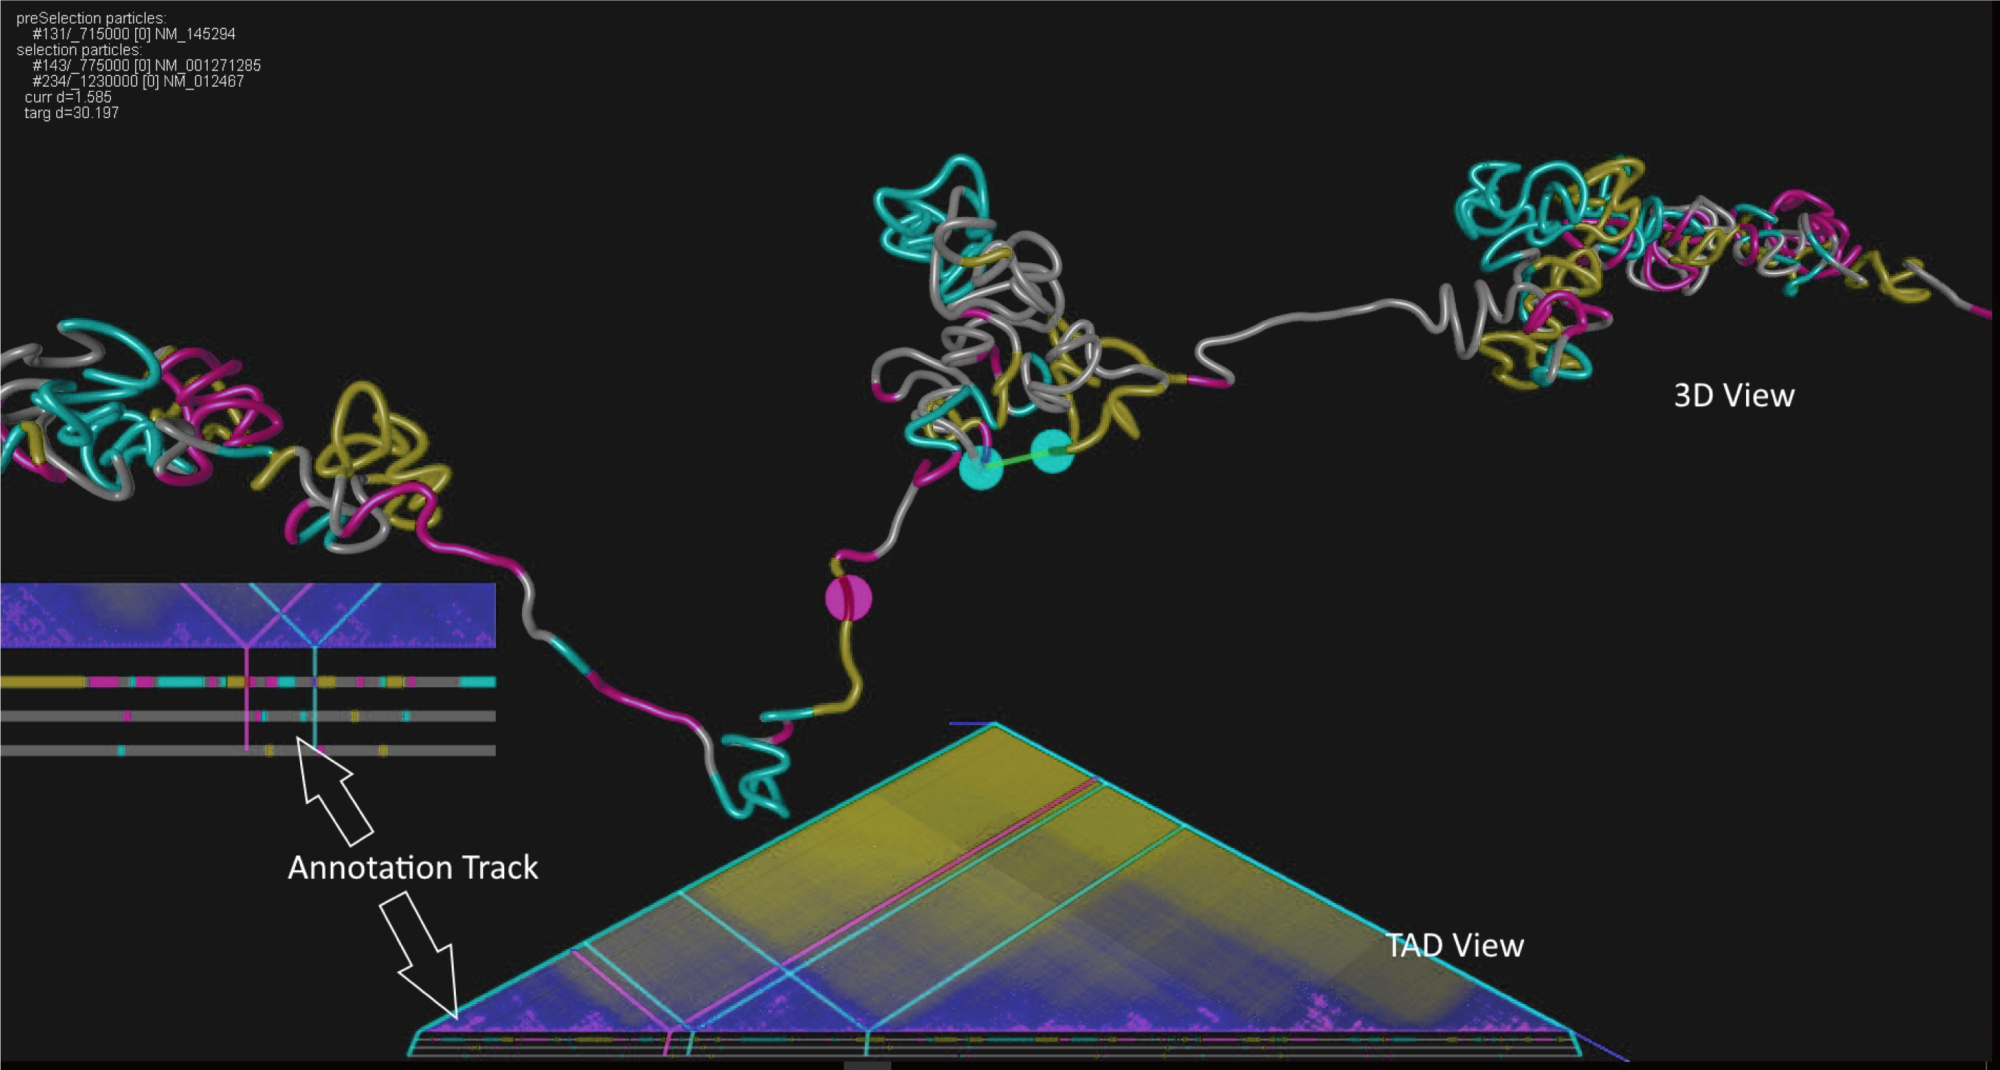
If you have a connected HTC Vive headset, once the model is loaded clicking on the function key ‘F2’ will put CSynth into Virtual Reality mode allowing a completely new way to look at the data in 3D! This should work with other headsets but has not been tested.
CSynth will look at the files presented and process them in the appropriate order. There may be cases where the automatic processing is not appropriate; we will be adding explicit configuration file options for such situations.
The following notes should be used to ensure any uploaded data is in a compatible format. There is much more detail in the CSynth User Guide.
• Contacts Format: CSynth accepts a number of data formats. The contacts are recorded using a simple, 3-column file format, encoding the interaction between two positions on the chromosome (first 2 columns) and the strength of that interaction (last column). The expected file extension is ‘.contacts’. The contacts are restricted to cis interactions and each file should contain data relating to just one chromosome.
A typical example would look like: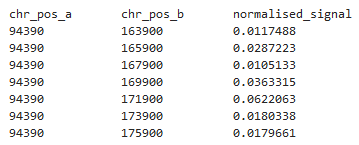
• normMatrix Format: This matrix format enables whole genome contact data to be stored in relatively compact form.
• BED Format: The contacts file above is the minimum requirement for viewing data using CSynth and can be visualised without any further accessory files. It is sometimes useful however to highlight different regions of the genome under investigation using either text labels or by colouring the DNA backbone. Both of these can be achieved using an accessory, BED format identifying the regions to be highlighted.
This file records the name of the reference sequence, and the start and end of the highlighted region in the first three columns. Any labels for the region are recorded in the fourth column and the desired colour (RGB value) for the region is recorded in the ninth column. An example of this file format is given below:
More details concerning BED format can be found at UCSC: file FAQ
• WIG Format:
This data format allows the visualisation of quantitative data (e.g. from ChIP-Seq) on the chromosome where the diameter of the ribbon increases proportionally to the value in the wig file.
More details concerning WIG format can be found at UCSC: file FAQ
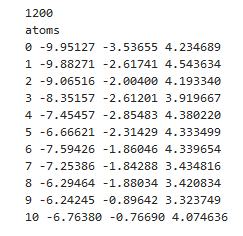
• XYZ Format:
An existing conformational 3D model can be described using XYZ format and is useful to allow comparisons with the Hi-C contact data or the results of CSynth folding generated from Hi-C. An example of the XYZ file format is given below: