Fusion M2: Laser Cutter & Engraver
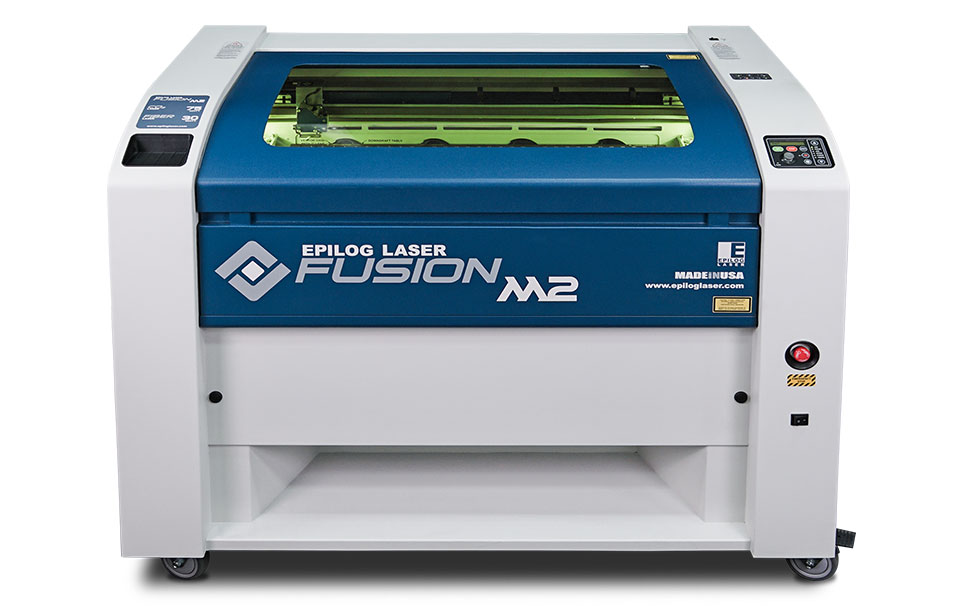
Specfications
- max cutting size: 1016 x 711 mm
- max material thickness: 5 mm
- integrated air assist: NO
- preview camera system: NO
- materials: acrylic, plywood, cardboard, paper, glass (engrave), cotton fabric, full material list (including permitted/prohibited materials)
- offical technical specfications
Health & Safety
Laser Cutters, when used incorrectly and without sufficient exhaust, can be a fire risk. You must understand and abide by all our health and safety rules and procedures in order to safely operate the machine. We have a NO MAINTENANCE POLICY so never attempt any maintenance operations by yourself. Ever. If you suspect there is something wrong with the laser cutter contact a technician.
DO NOT's:
- Do not operate the machine when alone in the lab
- Do not do any maintenance
- Do not use your own materials without checking with us! If you bring your own materials - YOU MUST check with technician first.
- Do not run the machine without Air Exhaust AND Assist
- Do not engrave or cut Vinyl/PVC EVER
- Do not use the computer next to the laser cutter for designing, only use for sending files to the laser cutter.
DO's:
- Do prototype and first test using cardboard
- Do ask questions! If you ever feel unsure or notice something not right ask one of the technicians. There are no stupid questions!!
Machine Safety:
- AIR EXHAUST & AIR ASSIST MUST BE ON BEFORE LASER OPERATION and let them run for 5 seconds after the job is done before opening the lid
- NEVER EVER LEAVE MACHINE UNATTENDED DURING OPERATION. NOT EVEN FOR 5 SECONDS.
In Case of Fire:
- hit the EMERGENCY STOP button
- shut down air assist and air exhaust
- hit the emergency door open/fire alarm located next to the door to G11
- tell others to leave without endangering yourself
- call security on ext. 666 from any campus landline or 0207 896 2121 BUT if they don’t pick up then call 999
- leave the building and meet at the assembly point: Loring Hall
Machine Operation
This section goes through preparing the laser cutter to prototype our file in cardboard, and then cut & engrave our chosen material.
Preparing the Laser Cutter
- Make sure laser bed is clean and empty.
- Turn on the machine.
- Wait for calibration/initialisation routine to complete.
BUG ALERT If both sides of the lid are not locked before you turn the laser cutter on the initialisation routine will not complete. Solution: Close the lid and turn OFF then ON again. - Go to the Control Panel and switch to the Focus option. Use the joystick to move the bed approximately to the desired height. In case
of thin sheet material - to just about close the round exhaust vents.

- VERY CAREFULLY load your material in. Always prototype in cardboard first! This way you can make mistakes without wasting your acrylic/ plywood etc.
-
Mount the focusing tool, found to at the front left of the laser cutter
-
Close the lid, do not slam the lid shut - make sure both switches are engaged, you can see this on the Safety Interlock Panel
BUG ALERT If both switches are not engaged you will not be able to use the control panel. Gently close both sides of the lid until you see the LEDs under the safety interlock panel turn on.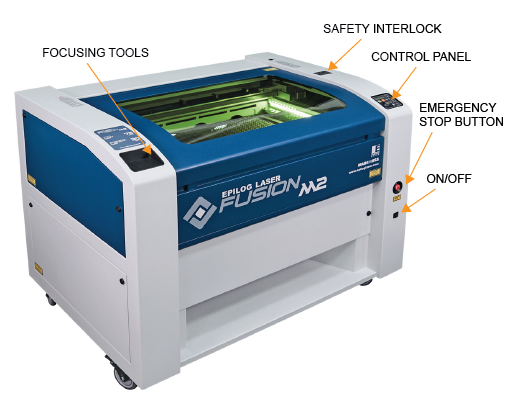
-
Focus: bring the bed up so that the material just meets the focusing tool.
- There are two focus modes: fast and fine, shift the joystick left/right once to toggle between fine and fast focus.
- Use fast focus to bring the bed close to the end of the focusing tool, and then switch into fine focus to continue bringing the bed up to meet the tip of the tool.
- Remove the focusing tool.
Adobe Illustrator
- Open your design in Adobe Illustrator.
- Check our article on designing your file for a detailed step-by-step on how to prepare your file for cutting vs. engraving. These a summary of the settings needed to cut/ engrave:
- cutting (or vector)
- stroke width: 0.01mm
- fill: none
- position things as top left as possible/ close together to save space and material.
- engraving
- stroke width: 0.01mm
- fill: black/ any colour
- Click File > Print or ctrl + p
- Make sure the Printer is set to Laser Cutter & Engraver
- Click Print
Epilog Dashboard
We first need to laser cut our design in cardboard to ensure the scale/ path/ number of cuts is correct. This way we don't waste time/ expensive materials such as acrylic if there are mistakes/ issues with our file/ settings.
Note: the jargon for 'cutting' and 'engraving' is different inside the Epilog Dashboard:
- Vector = Cutting
- Raster/ Engrave = Engraving
- Position your objects in the top left
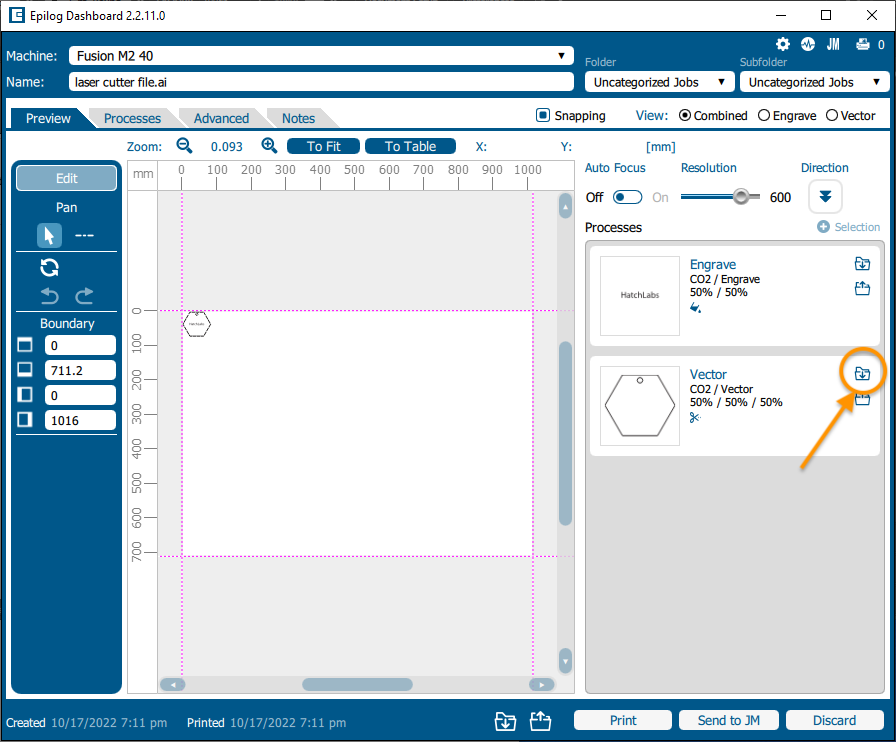
- In the Processes pane, click the import button (folder with down arrow icon) next to Vector to import the material settings
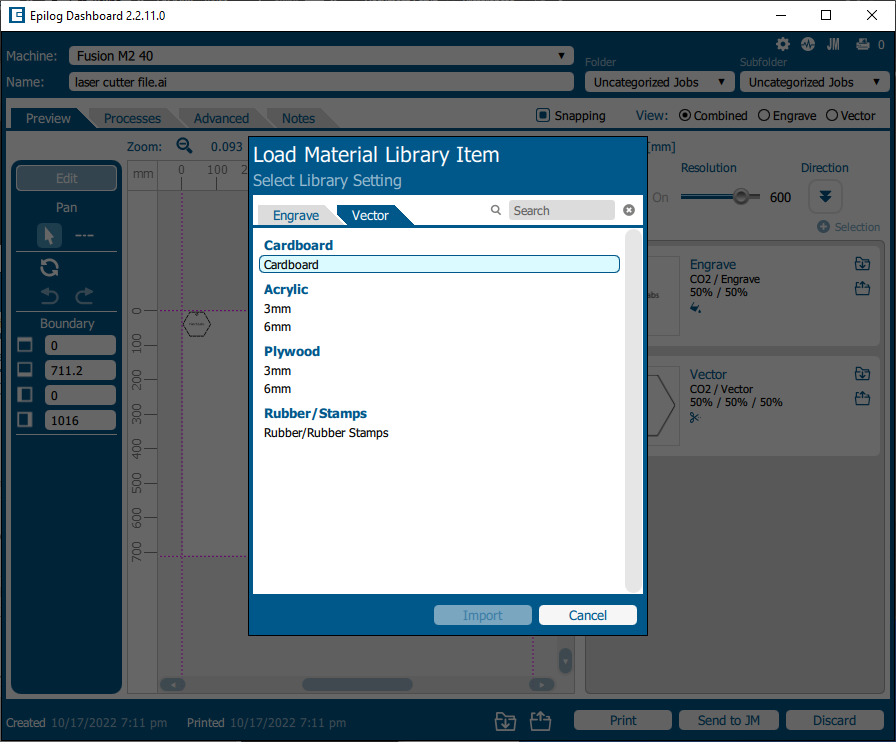
- Select Cardboard from the material settings and click Import
- In the Processes pane, click on the Engrave process. Select Process Type: Off
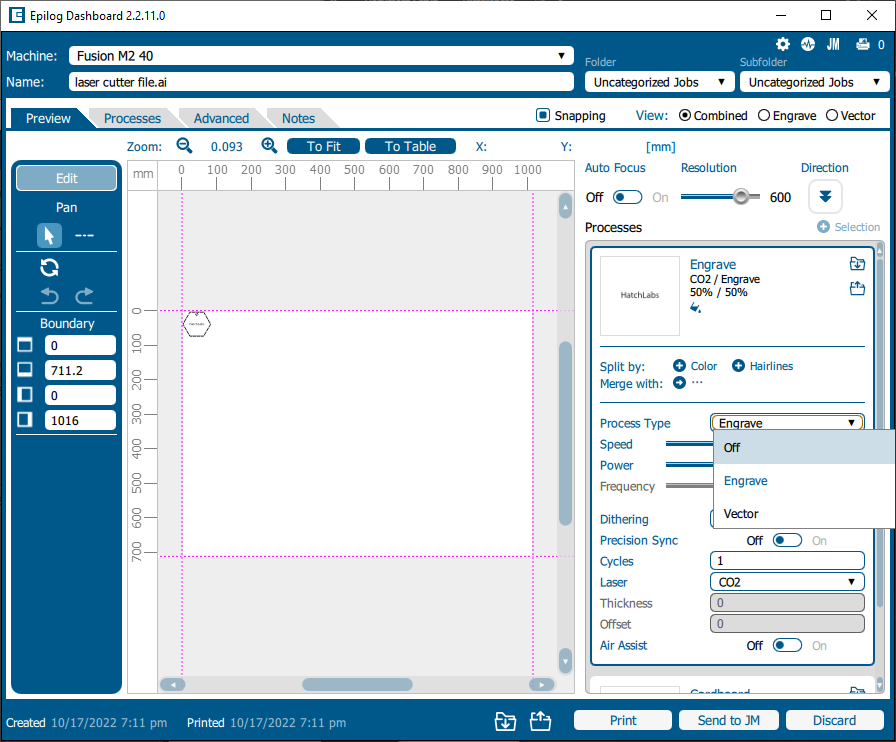
- Click Print to send the file to the laser cutter
Material Cutting and Engraving
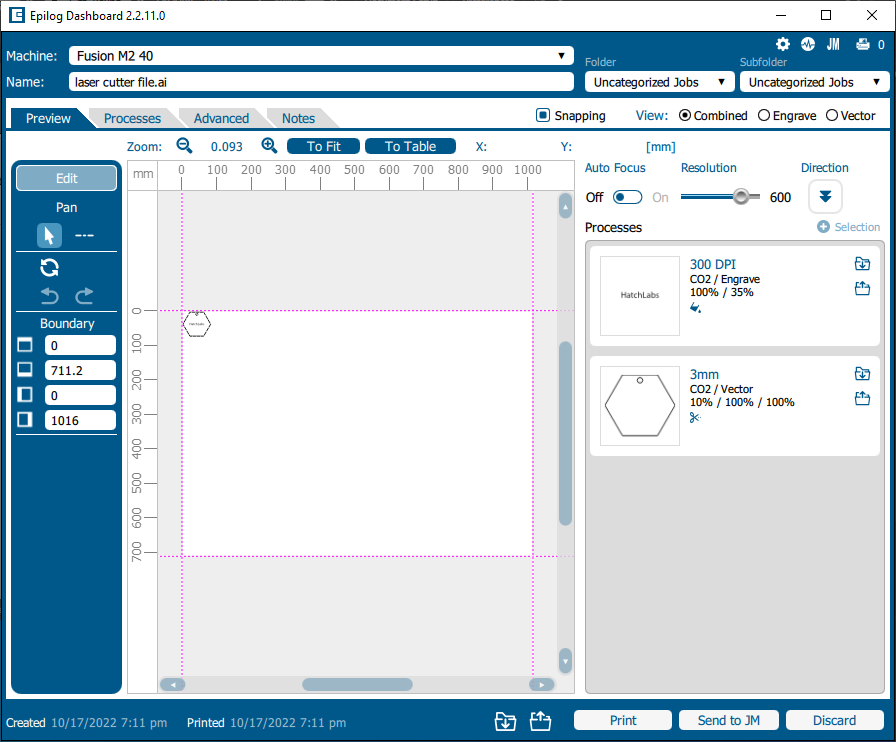
- In the Processes pane, click on the Engrave process. Select Process Type: Engrave
- Import the Vector and Engrave settings for your material e.g 3mm Acrylic settings are imported below:
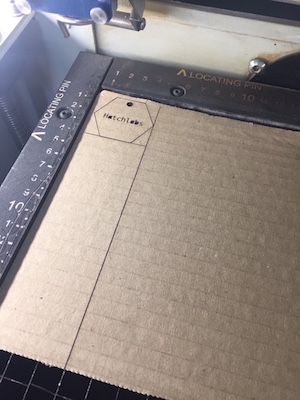
Cardboard Cutting
Safe Laser Cutter Operation
To operate the laser cutter safely we need to extract the dangerous fumes that emit from burning materials. We use an extraction system next to the laser cutter which extracts and filters the fumes. The air assist next to the computer screen blows away small pieces of debris/ cut material that could get between the laser and your material. These next steps are the most important steps, always run the laser with extraction and air assistance!
- Turn on exhaust
- Turn on air assist
- Triple-check everything is on and focused and there’s nothing obstructing laser head moving for example, the focusing tool left in, the hold down weights are not in the way of the laser's path.
- press “Go”
- WATCH THE JOB UNTIL COMPLETION
- Once the job is done - wait 10 seconds before turning off the exhaust and air assist to allow fumes to be properly removed
- Open the machine and VERY CAREFULLY remove your pieces
- If you are happy with the cut then return to the Epilog Dashboard and click Print with the new material settings.
- Carefully place an offcut of acrylic onto the laser cutter bed.
- Repeat all the previous steps from the above section "Preparing the Laser Cutter" to refocus the laser cutter using a new material.
- Repeat all the previous steps from this section on "Safe Laser Cutter Operation"
- Put your RECTANGULAR offcuts under the workbench with the same materials, and put all other rubbish in the appropriate material bin.
FAQs
Q: My job is 0 seconds long. What’s up?
A: Check the “Job Type” in print preferences & the stroke width of your vectors. If the “Job Type” is set to “Vector”, the laser cutter will not receive information on images or vectors with a stroke width greater than 0.01mm . If
the “Job Type” is set to “Raster”, the laser cutter will not receive information on vectors with a stroke width of 0.01mm or smaller.
Q: The control panel isn’t working, I can’t focus/ move the jog!
A: The lid is probably not locked. Are both Left and Right lights lit on the “Safety Interlock Panel”?
Q: The laser hasn’t cut fully through my material!
A: DO NOT TOUCH THE MATERIAL, leave it in the laser cutter so that it is still aligned and then run the job again, potentially on a faster setting. TIP: One way to tell whether materials have cut all the way
WITHOUT touching them is to see if objects ‘fall’ slightly/ through the grid of the bed.
Q: The Laser Cutter isn’t turning on after an emergency stop?
A: Make sure the emergency stop button is not pressed in.
Q: The focus is going really slowly?
A: You are in fine focus mode, shift the toggle left/right to go between normal and fine focus movements.
Q: There’s lots of burn marks on my material
A: If the material does not come with a protective seal (or has been taken off) cover it in masking tape. There is a large real of masking tape next to the laser cutter on the cutting table. If there is none there inform a technician.
Q: When I turn the laser cutter I get this error: “Driver Error: Door Open”
A: The door must be fully shut before you turn the laser cutter on. Close the door and ensure that both the Left and Right lights on the “Safety Interlock Panel” turn on. Turn the laser cutter off and on again.